📖 Article Content 📖
There is something truly special about making things with your own hands, and creating a papier mache turtle offers a wonderful chance to bring a little bit of playful art into your surroundings. This kind of project lets you use simple, everyday materials to build something quite unique. It is, you know, a way to make a little sculpture that carries your personal touch. Plus, it is a fun activity for just about anyone who likes to get creative and see an idea come to life from humble beginnings. This process, actually, can feel very rewarding, giving you a sense of accomplishment when your turtle friend takes shape.
The joy of putting together a piece like a papier mache turtle comes from the process itself, from the very first thought you have about it to the moment it stands finished. You might find yourself gathering various paper bits, maybe some old newspapers, or perhaps even some of the lovely paper products you usually use for other things. It is about seeing the potential in what is around you, and, in some respects, giving new purpose to paper that might otherwise be set aside. This kind of craft work, really, invites a gentle pace, allowing you to enjoy each step as you build up the form of your little creature.
As you think about making your own delightful papier mache turtle, you will discover that a bit of planning can make the whole experience even better. Having a good spot to jot down ideas, perhaps sketch out how you want your turtle to look, or even keep track of the bits and pieces you will need, can be quite helpful. This is where having the right kind of paper products, like those pretty notebooks or even a planner, can actually play a part in your creative journey. They help you keep your thoughts organized, making sure your artistic adventure flows smoothly from start to finish, you know.
- Linda Peterson Home Depot
- Will Smith Anxiety Dance
- 2024 2003
- Nadie Se Ha Preocupado Tanto Por Mi
- De Que Pais Es Gerson Chavarria
Table of Contents
- Why Make a Papier Mache Turtle?
- Getting Started with Your Papier Mache Turtle
- What Supplies Do You Need for a Papier Mache Turtle?
- Planning Your Papier Mache Turtle Design
- How to Shape Your Papier Mache Turtle?
- Adding the Finishing Touches to Your Papier Mache Turtle
- Where Can You Show Off Your Papier Mache Turtle?
- Documenting Your Papier Mache Turtle Creation
Why Make a Papier Mache Turtle?
You might wonder why someone would choose to spend time putting together a papier mache turtle. Well, for one thing, it is a wonderfully accessible craft that does not ask for a lot of special tools or very expensive materials. It is a chance to use your hands to bring something into being, something that reflects your own imagination. This sort of making can be very calming, a quiet activity where you can focus on the gradual shaping of your creation. It is, in a way, a little escape from the usual pace of life, offering a chance to slow down and simply create, very much.
Creating a papier mache turtle also gives you a piece that is truly one of a kind. Unlike something you might buy from a store, your turtle will carry the marks of your effort and your particular style. You get to pick the colors, decide on the expression, and give it a personality all its own. This personal touch means that the finished turtle is not just an object, but a small story of your creative spirit. It is, you know, a way to make each day feel a little more noteworthy, adding a handmade element to your surroundings or giving a truly thoughtful present to someone special.
Beyond the personal satisfaction, a handmade papier mache turtle can be a delightful addition to any space. It might sit on a shelf, bring a bit of cheer to a desk, or even become a unique paperweight. The process of making it is, too, a good way to spend time, whether you are doing it by yourself or with family and friends. It offers a chance for shared laughter and quiet concentration, building not just a turtle, but also some lovely memories. So, the reasons for making one are many, really, from personal enjoyment to creating something charming for your home.
Getting Started with Your Papier Mache Turtle
The first step in making your very own papier mache turtle is often about gathering your thoughts and getting some initial ideas down. Before you even think about glue and paper strips, you might want to sketch out a few different turtle shapes. Do you want a big one or a small one? Will it have a smooth shell or a bumpy one? These early decisions, you know, can really help guide the rest of your project. This is where a good notebook comes in handy, providing a spot for all your preliminary drawings and notes.
You can use a personalized planner or one of those beautifully designed notebooks to keep all your ideas in one spot. Papier offers a range of notebooks, like those with lined, dotted, or plain pages, so you can pick what works best for your sketching style. Having a dedicated place to plan, like a personalized papier notebook, makes the whole process feel more organized and less like a jumble of random thoughts. It is, too, a way to make sure you do not forget any of those brilliant ideas that pop into your head while you are thinking about your papier mache turtle.
Maybe you want to look at pictures of real turtles for inspiration, or perhaps you have a specific cartoon turtle character in mind. Jotting these things down in a notebook, even if it is just a few words about colors or textures, can be very useful. A hardcover plain notebook, like the Le Classique A5 from papier, with its 96 leaves of white paper and a smooth finish, could be a perfect companion for this initial planning phase. It gives you a nice, sturdy place to begin your creative journey, very much, for your future papier mache turtle.
What Supplies Do You Need for a Papier Mache Turtle?
When you are ready to make a papier mache turtle, knowing what materials you will need is quite important. The basic supplies are pretty simple: paper and some sort of adhesive. For the paper, you can use old newspapers for the main bulk of the shape. However, for the outer layers, or for adding details, you might want to consider using something a little nicer. This is where paper products from places like papier could come into play, offering different textures and strengths.
For the glue, a simple mixture of flour and water often works well, or you can use white craft glue diluted with a bit of water. You will also need something to form the basic shape of your turtle – crumpled newspaper, cardboard, or even an inflated balloon can serve as a starting point. And, of course, once your papier mache turtle is dry, you will want paints to bring it to life. Acrylic paints are a good choice because they offer bright colors and dry fairly quickly. You will also need brushes of various sizes, and perhaps a clear sealant to protect your finished work.
Think about how you want your turtle to look. If you want to add personalized touches, you might also consider things like stickers or even bits of personalized stationery. While the core of papier mache uses simpler papers, the finishing touches can definitely benefit from higher quality materials. Papier, for example, offers stationery printed on premium paper, which could be useful for creating specific decorative elements for your papier mache turtle. This attention to detail, you know, can really make your turtle stand out.
Planning Your Papier Mache Turtle Design
Once you have a general idea and know what supplies you will need, the next step for your papier mache turtle is to really get into the specifics of its design. This is where your planning notebook becomes a true companion. You can draw different angles of your turtle, figuring out the curve of its shell, the length of its neck, and the shape of its little feet. Thinking about these details beforehand can save you time and effort later on, allowing your project to flow more smoothly.
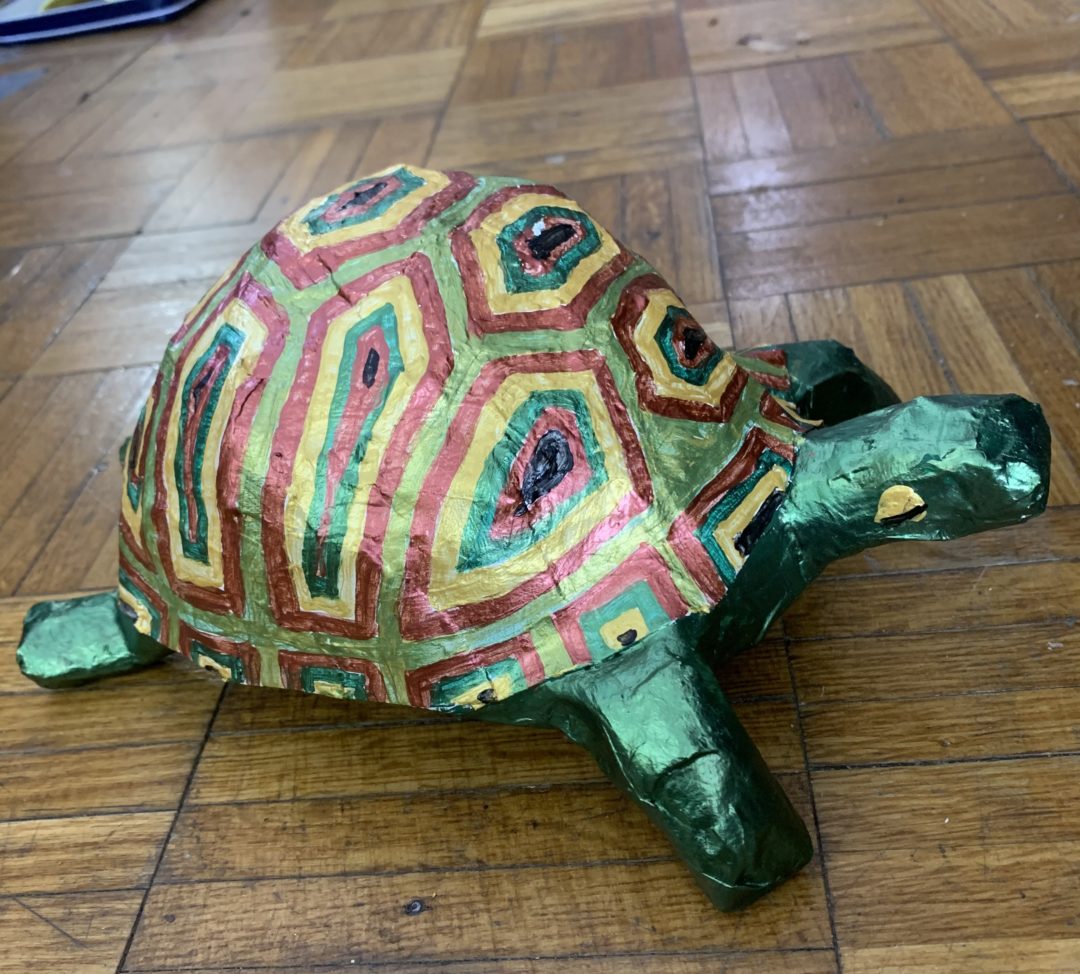
Consider the patterns you might want on the shell. Will it be plain green, or will you add spots, stripes, or perhaps even a mosaic-like pattern? You could sketch these ideas directly onto the pages of your notebook. Papier notebooks, with their choice of lined, dotted, or plain paper, give you the flexibility to either sketch freely or use the lines and dots to help with proportion. You can also personalize the cover of your notebook, making it a very special place to house all the creative thoughts for your papier mache turtle.
You might even use sections of a recipe journal, not for food, but for organizing your design ideas. Just as a recipe journal has spaces to note different dishes, you could use sections to list color palettes, different shell textures, or even where you might find particular craft supplies. This kind of organized approach, you know, helps keep all the elements of your papier mache turtle project clear in your mind. It is, in a way, like having a blueprint for your creative endeavor, ensuring you have all your plans laid out.
How to Shape Your Papier Mache Turtle?
The actual shaping of your papier mache turtle is where the magic really starts to happen. You will begin by creating a basic form, perhaps using crumpled newspaper taped together, or a balloon for the roundness of the shell. This initial structure provides the skeleton for your turtle. It is important to make sure this base is sturdy enough to hold the wet paper strips you will be applying. This step, you know, is all about getting the fundamental proportions right before you add the layers.
Next comes the layering. You will dip strips of paper into your glue mixture, wiping off any extra, and then carefully lay them onto your base. Overlap each strip slightly, making sure to smooth out any air bubbles or wrinkles as you go. This process is repeated, building up several layers. Each layer adds strength and helps to refine the shape of your papier mache turtle. It is a bit like building something piece by piece, allowing it to take on a solid form very gradually.
You will need to let each set of layers dry completely before adding more. This can take some time, so patience is quite key here. As you add more layers, you can start to refine the details of your turtle, like shaping the head, legs, and tail more precisely. This building up of layers, in some respects, is what gives papier mache its unique texture and durability. It is a slow and steady process, but the results are often quite satisfying, bringing your papier mache turtle to life bit by bit.
Adding the Finishing Touches to Your Papier Mache Turtle
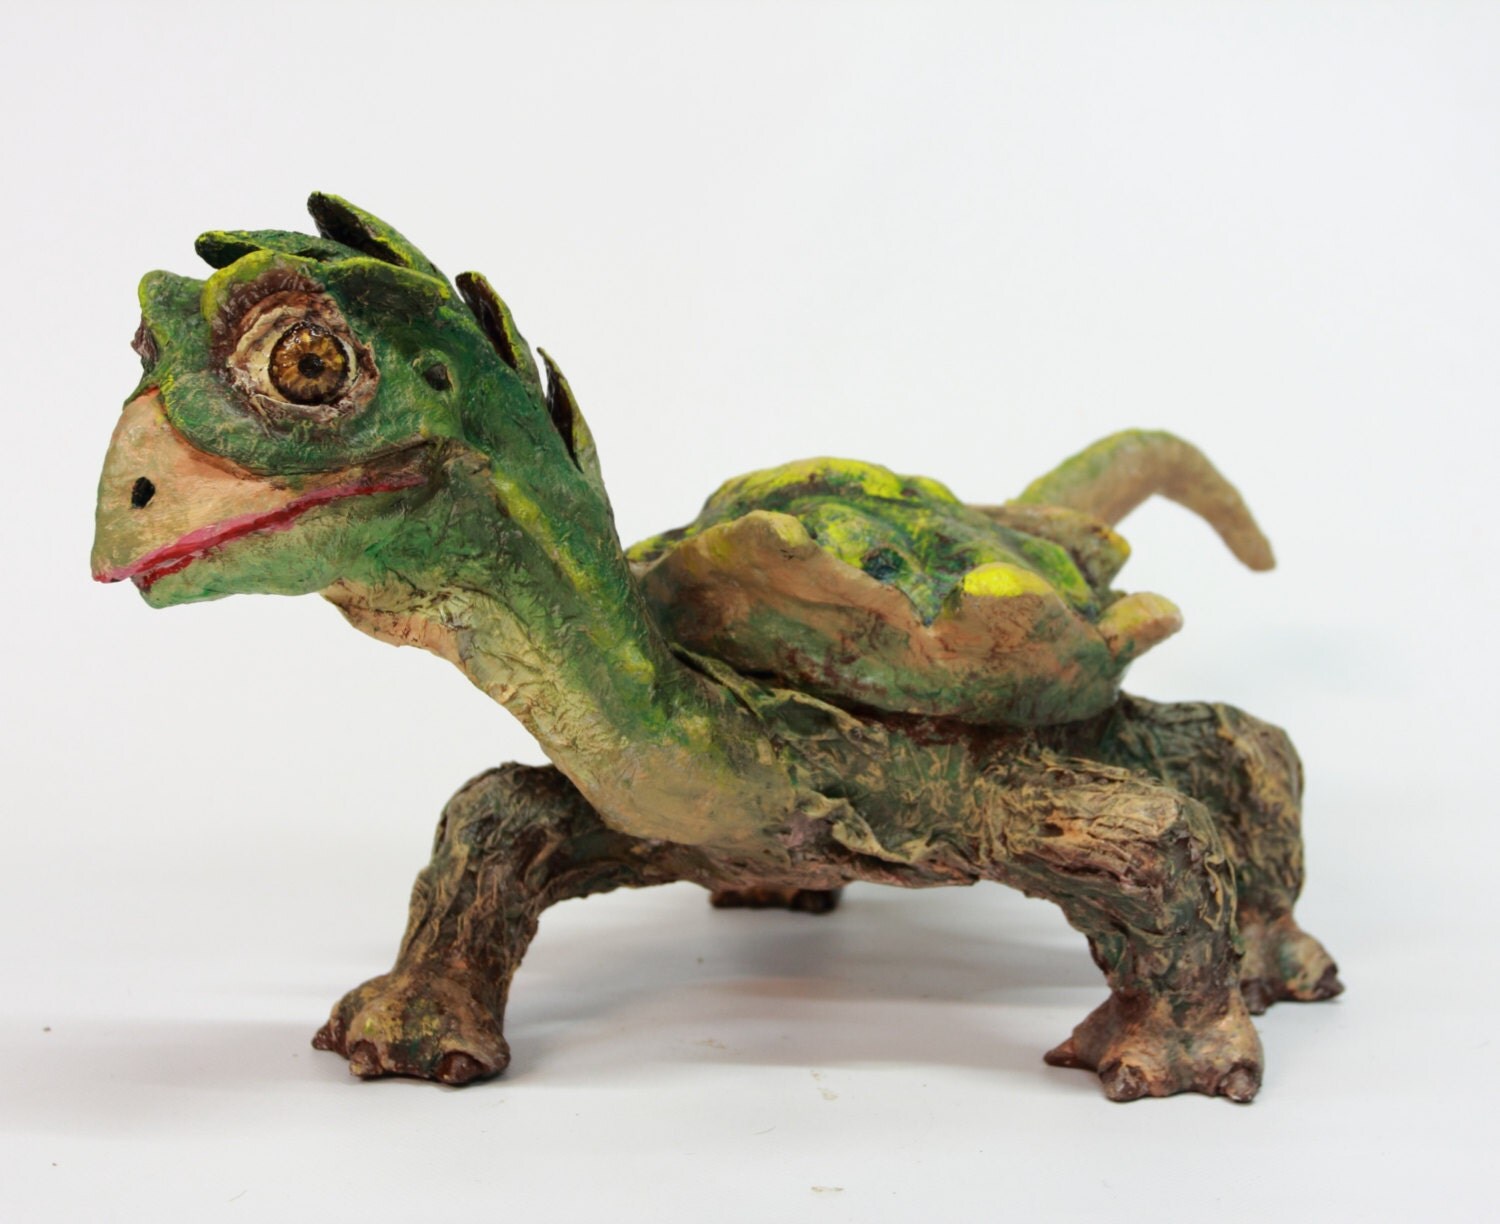
Once your papier mache turtle is completely dry and hard, it is time for the exciting part: adding color and details. This is where your turtle truly gains its personality. You will use paints to give it its skin color, shell patterns, and expressive eyes. Think about what kind of turtle you want to create. Will it be a realistic shade of green and brown, or a fantastical creature with bright, playful colors? The choice is entirely yours, you know, allowing for a lot of creative freedom.
You can use different sized brushes to get into smaller areas and add fine lines. If you want to add a bit of sparkle or texture, you might even consider using glitter glue or other embellishments. For those who enjoy adding a personal touch, perhaps some small, decorative stickers from a stationery set could be used for eyes or shell patterns. Papier offers a range of stationery items, including stickers, which could add a charming detail to your papier mache turtle.
After the paint has dried, it is a good idea to apply a clear sealant. This will protect your papier mache turtle from moisture and dust, and give it a nice, finished look, either glossy or matte. This final step ensures that your handmade creation will last for a long time, allowing you to enjoy your efforts for many years to come. It is, too, the moment when all your hard work comes together, presenting a lovely, durable piece of art.
Where Can You Show Off Your Papier Mache Turtle?
After all your effort and creative energy, you will naturally want to find a good spot for your finished papier mache turtle. It could sit on a bookshelf, adding a touch of whimsy to your collection of books. Perhaps it will brighten a desk, serving as a charming companion while you work or study. Or, it might even become a unique centerpiece on a table, sparking conversations with anyone who sees it. The beauty of a handmade item is that it carries a story, and its placement can reflect that.
Your papier mache turtle could also make a truly thoughtful present for someone special. A gift made with your own hands carries a lot of meaning, showing care and personal effort. Imagine giving a friend or family member a turtle that you created yourself, knowing it is a one-of-a-kind item made just for them. This kind of gift, you know, often brings a lot of joy and appreciation, much more than something bought from a store. It is, in a way, a little piece of your creativity shared with another.
You might also consider taking pictures of your finished papier mache turtle and putting them into a photo book. This way, you can share your creation with friends and family who might not be able to see it in person. Papier offers photo books that are beautifully designed, allowing you to showcase your artistic projects in a lovely format. Shipping from local printers, these photo books provide a wonderful way to document and share your creative accomplishments, allowing your papier mache turtle to be admired by many.
Documenting Your Papier Mache Turtle Creation
Keeping a record of your creative projects, like making a papier mache turtle, can be just as rewarding as the making itself. Think about taking pictures at different stages: when you are sketching your initial ideas, when you are building the base, as you apply the layers of paper, and of course, the finished piece. These photos tell the story of your creation, from a simple idea to a tangible object. It is, you know, a way to truly make each day noteworthy, by capturing the moments of your creative process.
You can then gather these photos and put them into a personalized photo book. Papier offers a range of photo books, which are a perfect place to keep these visual memories. You can arrange the pictures in order, perhaps adding little notes or captions to describe each step or what inspired you. This creates a lovely keepsake that you can look back on and share with others. It is, too, a way to celebrate your artistic journey, showing how your papier mache turtle came into being.
Beyond photo books, you could also use a personalized journal to write down your thoughts and feelings about the project. Maybe you faced a challenge and found a clever solution, or perhaps you discovered a new technique you want to remember for next time. Papier journals are your place to plan and reflect, offering a spot to note down all these experiences. They are, you know, a way to keep a personal record of your creative adventures, ensuring that the story of your papier mache turtle is fully captured.